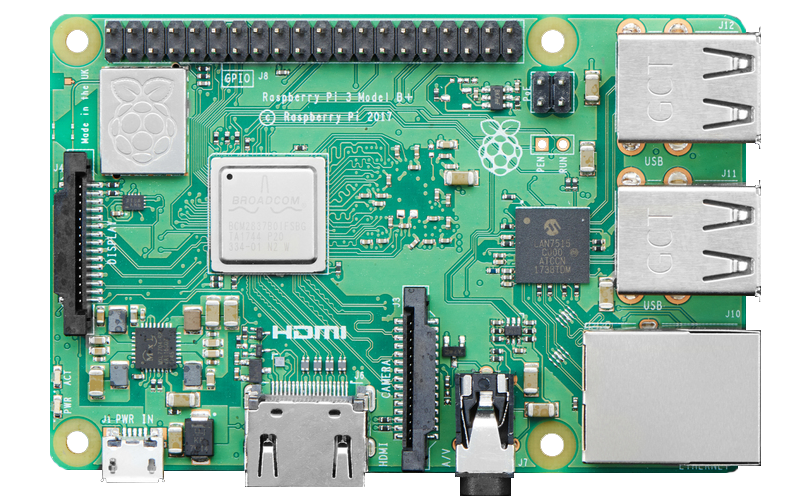
Setting up the Raspberry Pi
Go to the official website of Raspberry Pi and download Raspbian Stretch with Desktop if you want version with desktop or Raspbian Stretch Lite if you want version without desktop. I recommend Raspbian Stretch with Desktop
After the download extract the .zip and we will get a .img
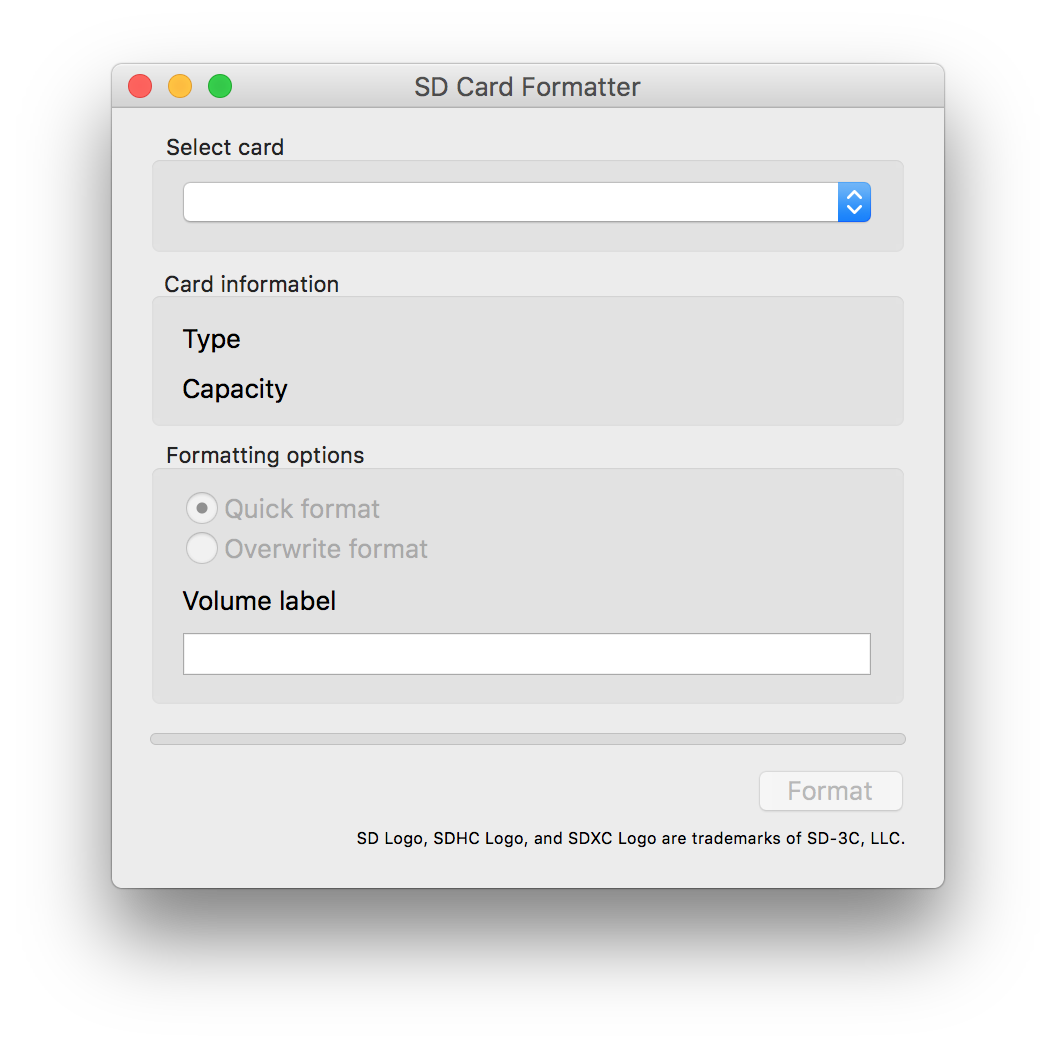
Download SD Memory Card Formatter 5.0 for SD/SDHC/SDXC compatible with MacOS and Windows. Use it to format your SD card and do not give us any problems when installing Raspbian.
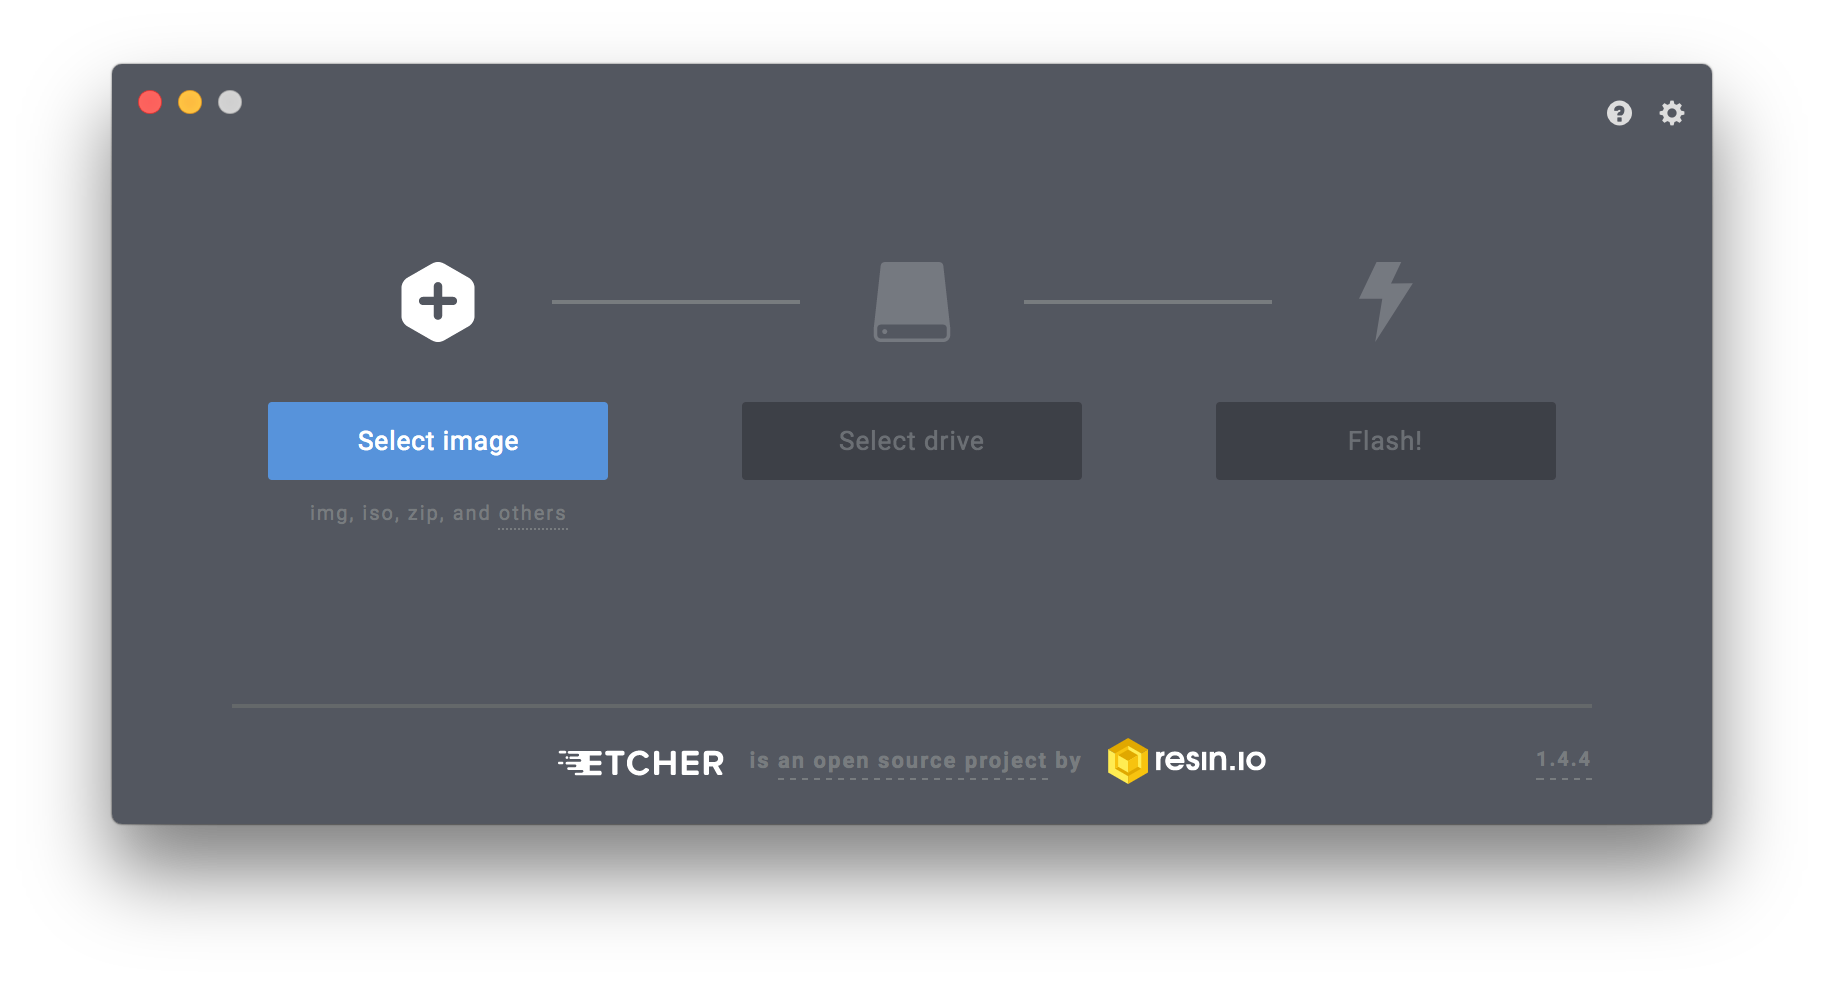
Download Etcher compatible with MacOS, Linux and Windows. Use it to install the Raspbian image on the SD card.
Configure SSH (Headless)
Create a file in the root of the SD Card on boot partition with the name of SSH without extension.
Access the Raspberry Pi through SSH
macOS or Linux
Open terminal and type the following command:
ssh pi@RASPBERRYPIIPEnter the default password raspberry and you're done.
Windows
Download PuTTY enter the IP of the Raspberry Pi, the default user is pi and default password is raspberry and you're done.

Configure Wi-Fi (Headless)
Optional if you use Ethernet
Create a file in the root of the SD Card on boot partition with the name of wpa_supplicant.conf with one of the following options:
If your network is password protected
country=ES
ctrl_interface=DIR=/var/run/wpa_supplicant GROUP=netdev
update_config=1

network={
    ssid="YOUR_SSID"
    psk="YOUR_PASSWORD"
}
If your network is not password protected
network={
    ssid="YOUR_SSID"
    key_mgmt=NONE
}
If your network is hidden
network={
    ssid="YOUR_HIDDEN_SSID"
    scan_ssid=1
    psk="YOUR_PASSWORD"
}
Raspberry Pi 3 B or B+ (Wi-Fi)
If your network is disabled When you log in through SSH, Wi-Fi is deactivated because country is not defined. You have two options:
1. From terminal do sudo raspi-config and configure the country.
2. Add country = ES on wpa_supplicant.conf as we see above.
The reason for this is that this Raspberry is compatible with the 5gHz band and need to know in which country you are to configure the band's channel.
Raspberry Pi Zero W (Wi-Fi)
If you can not configure Wi-Fi, I recommend installing Noobs and through this install Raspbian and you will not have problems.
Impossible to connect (Wi-Fi)
If you think that nothing works, try connecting your Raspberry Pi via Ethernet, try accessing via VNC and set up via desktop.
Source: desertbot.io
VNC (Virtual Network Computing)

Advantages
1. It is installed by default in Raspbian, you just have to activate it.
2. It starts automatically when you turn on the Raspberry Pi.
3. We can access our Raspberry Pi from anywhere if we have registered in Real VNC and logged in with your account.
Access through SSH
sudo raspi-configGo to Interfacing Options and select VNC to Yes.
This starts automatically when you turn on the Raspberry Pi.
User and password that you use to access the remote desktop would be the same one that come by default to log in to RaspBerry Pi, user: pi and password: raspberry
To change the VNC password from the terminal, enter the command:
vncpasswdFor remote access to your desktop download VNC Connect which is compatible with all platforms and will allow you to access your remote desktop.
Source: raspberrypi.org
Install Octoprint on Raspberry Pi 3 B+ with Pi Camera
Basic Setup
For the basic package you'll need Python 2.7 (should be installed by default) and pip. OctoPrint's dependencies will be installed by pip:
cd ~
sudo apt update
sudo apt install python-pip python-dev python-setuptools python-virtualenv git libyaml-dev build-essential
mkdir OctoPrint && cd OctoPrint
virtualenv venv
source venv/bin/activate
pip install pip --upgrade
pip install https://get.octoprint.org/latest
You may need to add the pi user to the dialout group and tty so that the user can access the serial ports:
sudo usermod -a -G tty pi
sudo usermod -a -G dialout pi
You should then be able to start the OctoPrint server:
~/OctoPrint/venv/bin/octoprint serveIt will be running on http://0.0.0.0:5000/
Support restart/shutdown through OctoPrint's system menu
While running Octoprint go to Settings > Commands, configure the following commands:
- Restart OctoPrint:
sudo service octoprint restart - Restart system:
sudo shutdown -r now - Shutdown system:
sudo shutdown -h now
Automatic start up
Download the init script files from OctoPrint's repository, move them to their respective folders and make the init script executable:
wget https://github.com/foosel/OctoPrint/raw/master/scripts/octoprint.init && sudo mv octoprint.init /etc/init.d/octoprint
wget https://github.com/foosel/OctoPrint/raw/master/scripts/octoprint.default && sudo mv octoprint.default /etc/default/octoprint
sudo chmod +x /etc/init.d/octoprint
Adjust the paths to your octoprint binary in /etc/default/octoprint. If you set it up in a virtualenv as described above make sure your /etc/default/octoprint is modified like this:
DAEMON=/home/pi/OctoPrint/venv/bin/octoprintNote also the removed # at the start of the line, uncommenting it and making it effective!
Then add the script to autostart using sudo update-rc.d octoprint defaults.
This will also allow you to start/stop/restart the OctoPrint daemon via:
sudo service octoprint {start|stop|restart}Make everything accessible on port 80 (HAProxy)
If you want to have nicer URLs or simply need OctoPrint to run on port 80 (http's default port) due to some network restrictions, I recommend using HAProxy as a reverse proxy instead of configuring OctoPrint to run on port 80. This has the following advantages:
- OctoPrint does not need to run with root privileges, which it would need to to be able to bind to port 80 thanks to Linux privileged port restrictions
- You can make
mjpg-streameraccessible on port 80 as well - You can add authentication to OctoPrint
- Depending on the
HAProxyversion you can also use SSL to access OctoPrint
Setup on Raspbian is as follows:
sudo apt install haproxyOnce installed, you have to edit the file /etc/haproxy/haproxy.cfg:
sudo nano /etc/haproxy/haproxy.cfgglobal
maxconn 4096
user haproxy
group haproxy
daemon
log 127.0.0.1 local0 debug
defaults
log global
mode http
option httplog
option dontlognull
retries 3
option redispatch
option http-server-close
option forwardfor
maxconn 2000
timeout connect 5s
timeout client 15min
timeout server 15min
frontend public
bind :::80 v4v6
use_backend webcam if { path_beg /webcam/ }
default_backend octoprint
backend octoprint
reqrep ^([^\ :]*)\ /(.*) \1\ /\2
option forwardfor
server octoprint1 127.0.0.1:5000
backend webcam
reqrep ^([^\ :]*)\ /webcam/(.*) \1\ /\2
server webcam1 127.0.0.1:8080This will make OctoPrint accessible under http://<your Raspi's IP>/ and make mjpg-streamer accessible under http://<your Raspi's IP>/webcam/. You'll also need to modify /etc/default/haproxy
sudo nano /etc/default/haproxyEnable HAProxy by adding the following line:
ENABLED=1After that you can start HAProxy by issuing the following command
sudo service haproxy startPointing your browser to http://<your Raspi's IP> should greet you with OctoPrint's UI. Now open the settings and switch to the webcam tab or alternatively open ~/.octoprint/config.yaml. Set the webcam's stream URL from http://<your Raspi's IP>:8080/?action=stream to /webcam/?action=stream (leave the snapshotUrl at http://127.0.0.1:8080/?action=snapshot!) and reload the page.
If everything works you can add the following lines to ~/.octoprint/config.yaml (just create it if it doesn't exist yet) to make the server bind only to the loopback interface:
server:
  host: 127.0.0.1
Restart the server. OctoPrint should still be available on port 80, including the webcam feed (if enabled).
Access OctoPrint over the Internet (HAProxy)
Optional and only for Advanced Users
A lot of you want to use OctoPrint outside of their local network (i.e. from the Internet, by using a smartphone connected to the cellular network for example).
Fortunately, this is possible. I’ll explain you how to do that. But please, read these few cautions first:
- You have to configure the router on which one your OctoPrint server is connected
- Making OctoPrint accessible over Internet is not recommended at all if you have not installed at least a proxy acting as a reverse proxy on your Raspberry Pi (the installation is detailed in this tutorial)
Some explanations
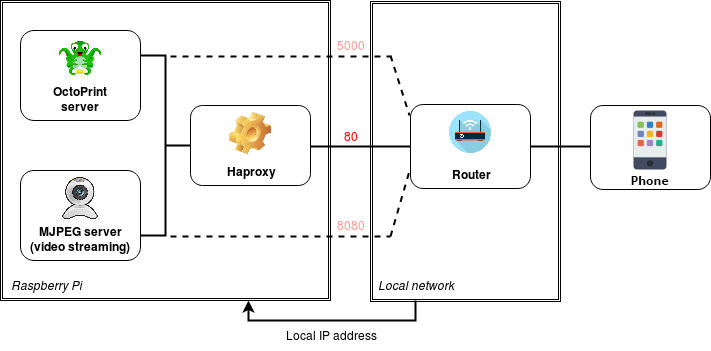
Here is a diagram to exposes your current situation on your local network:
Phone is connecting locally to your server (Using its LAN IP address)
I understand that some of you don’t have any skills in network configuration. For you, who wants to make your OctoPrint server reachable over the Internet, here are vulgarized explanations in order to understand why exactly you should configure your router.
- Your device (the Raspberry Pi) is represented by its local IP on your local network. For example 192.168.1.20. This IP identify your device on your local network only. This device has its own ports
For example port 80, port 22, port 21, port 5000…. Each device has the same range of port (device 1 has its own port 80, device 2 has its own port 80…) - Your devices are not represented by their local IP over the Internet. Because only, and only your router knows them.
- Your router is represented over the Internet by its public IP (WAN IP).
For example 82.24.543.539 - Your router also have its own public ports
For example 80, 21, 22…. These ports are not relative at all to your devicesyour Raspberry Pi for examplebut only relative to your router. So, do not confuse the port 80 local of your Raspberry Pi and the public port 80 of your router. - Now, if you want to reach a device
your Raspberry Pifrom the Internet, you must ask for your router the access to this device. Because your router is, for the moment, the only one who knows your device, we want to configure something like that: “Hello router, please, give me an access to the device identified by 192.168.1.20 on its port 80, so I can reach the server which is running on this port on this device!” - To do that, you have to configure a port forwarding. You must affect a public port
For example 1990to the device with the IP 192.168.1.20Raspberry Pi in this exampleto its port 80. So, when you request your router by using its public IP and the port 1990For example 82.24.543.539:1990then the router will understand that 1990 is bound to 192.168.1.20:80.
That means:
- Calling 82.24.543.539:1997 from the internet…
- …do the same as calling 192.168.1.20:80 from your local network
1990 is a random port value in this example. You can use another value if you want. This will be explained in the next parts of this tutorial. It’s not important for the moment, please don’t focus on this value like “wow 1990, why 1990, I don’t understand why 1990, I will set 1990, hurry up!”.
Finally, at the end of this tutorial, here will be the situation of your network configuration:
Phone is connecting remotely to your server (Using its WAN IP address and a public port)
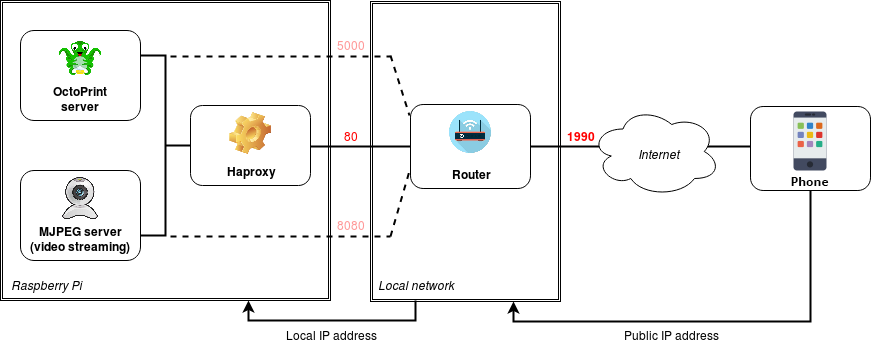
1990 is a random port value, it can takes any other value – don’t focus on this value.
Find your public IP (WAN IP ADDRESS)
You can’t use the local IP address of your Raspberry Pi from the outside of your local network for example 192.168.1.XX or 10.0.2.XX)
You shall use the public IP address of your router over the Internet to access your Raspberry Pi.
Here is a link that will show you this information: What is my IP. Of course, you have to click on this link only when you are connected to your local network (so on the same router as your Raspberry). Otherwise you’ll get the public IP of your network operator hardware, but not yours.
Enable the basic authentication
For the security of your Raspberry, and in general of all your local network, I advice you to install a proxy acting as a reverse proxy on your Raspberry Pi, and configure it to enable at least the basic authentication (per-user authentication).
The basic authentication from the reverse proxy is different than the user authentication in your OctoPrint web interface. This one will protect each request sent to OctoPrint with a mandatory authentication (user + password) otherwise the connection will be aborted.
You can install HAProxy on your Raspberry Pi, with the command
sudo apt-get install haproxy.HAProxy will let your enabling the connection using per-user authentication, but it will also make both of your OctoPrint server and video streaming accessible on the same port 80 (please see the diagram 2 at the top of this page)
Once installed, you have to edit the file /etc/haproxy/haproxy.cfg:
sudo nano /etc/haproxy/haproxy.cfgglobal
maxconn 4096
user haproxy
group haproxy
daemon
log 127.0.0.1 local0 debug
defaults
log global
mode http
option httplog
option dontlognull
retries 3
option redispatch
option http-server-close
option forwardfor
maxconn 2000
timeout connect 5s
timeout client 15min
timeout server 15min
frontend public
bind :::80 v4v6
use_backend webcam if { path_beg /webcam/ }
default_backend octoprint
backend octoprint
reqrep ^([^\ :]*)\ /(.*) \1\ /\2
option forwardfor
server octoprint1 127.0.0.1:5000
#### Enables basic authentication
acl AuthOkay http_auth(L1)
http-request auth realm octoprint if !AuthOkay
####
backend webcam
reqrep ^([^\ :]*)\ /webcam/(.*) \1\ /\2
server webcam1 127.0.0.1:8080
#### Don’t forget to replace USERNAME and PASSWORD
userlist L1
group G1
user USERNAME insecure-password PASSWORD groups G1
####Don’t forget to replace USERNAME and PASSWORD by the values of your choice. You can, if you want, insert as many users as you want, in as many groups as you want. An advanced configuration let you define different access privileges per user (or per group).
Forward public port on your router
Once you know your public IP (WAN) and the access to your server is at least protected by basic authentication, you can make your OctoPrint & mjpeg-streamer server instances accessible over the Internet.
I could not be more precise in the following informations since this configuration only depends on your router model.
The following informations are really important. You NEED to follow them in the given order or it will never work as expected.
Find how to access to the web interface of your router. In general, most of the manufacturers let this interface accessible from the IP 192.168.1.1 Log-in in the interface (most of time you should use admin/admin or admin/first chars of the default WPA key, by default) Find the local IP of your Raspberry Pi in the connected devices and define it as a static IP (static DHCP lease) Then, find the “port forwarding” setup page (this is also called NAT/PAT on some routers, most of time in the ‘advanced’ settings) In this screen, add a new port forward option:
| Method | IP (Local) | Port (Local) | Port (Public) |
|---|---|---|---|
| TCP/UDP (Both) | Your Raspberry Pi LAN IP (static) | 80 (if you have installed HAProxy) 5000 (if you haven’t installed HAProxy) | YOUR_CHOSEN_PORT |
Please note that YOUR_CHOSEN_PORT can be the value of your choice. But please, respect the following:
Don’t forward the port 80 to 80 (yes it is tempting, but really really not a good practice).
Don’t forward to an already used port (such as 53, already used for the DNS service).
- 0, 1, 2, 3… are not correct port values.
So, please select a value between 1000 and 10 000 (your birth year for example).
Sometimes the user ports range is indicated in the router interface. For example, the “FREE” network provider allows to use ports starting from 10 000 only.
In the diagram 2 at the top of this page, you can see that:
- The external port value 1990 was chosen (that was my personal choice – you can choose another value)
- The OctoPrint server is still accessible locally from the port 5000 (in addition to the port 80 if you have installed HAProxy)
- The MJPEG server (video streaming ) is still accessible locally from the port 8080 (in addition to the port 80 if you have installed HAProxy)
- To summarize, both of the OctoPrint & MJPEG server are accessible locally from the port 80 (if you have installed HAProxy), but now also externally from the port 1990.
Here is an example:
| Method | IP (Local) | Port (Local) | Port (Public) |
|---|---|---|---|
| TCP/UDP | 192.168.1.30 | 80 | 1990 |
Here is another example: Some routers let you defining ranges for ports to forward. Since we only want to forward one public port to one local port, then please apply the following:
| Method | IP (Local) | Port Start (Local) | Port End (Local) | Port Start (Public) | Port End (Public) |
|---|---|---|---|---|---|
| TCP/UDP | 192.168.1.30 | 80 | 80 | 1990 | 1990 |
Make only remote access protected by basic auth (Optional)
Please note that this step is:
- Optional. Do not follow this step if you are not concerned.
- For the advanced users only.
- Only for those who have installed plugins that don’t support the basic authentication in LAN
The main goal of this part is to request the authentication only when OctoPrint is reached over the Internet, and not when reached locally.
I will not copy the whole haproxy.cfg file again, so you only have to apply the changes in green.
frontend public
        bind :::80 v4v6
        use_backend webcam if { path_beg /webcam/ }

#### Only remote access protected ####
        use_backend octoprint_unsecure if { hdr_beg(host) -i 192.168 }
####

        default_backend octoprint

backend octoprint
        reqrep ^([^\ :]*)\ /(.*)     \1\ /\2
        option forwardfor
        server octoprint1 127.0.0.1:5000
        acl AuthOkay http_auth(L1)
        http-request auth realm octoprint if !AuthOkay

backend webcam
        reqrep ^([^\ :]*)\ /webcam/(.*)     \1\ /\2
        server webcam1  127.0.0.1:8080

#### Only remote access protected ####
backend octoprint_unsecure
        reqrep ^([^\ :]*)\ /(.*) \1\ /\2
        option forwardfor
        server octoprint1 127.0.0.1:5000
        acl needs_scheme req.hdr_cnt(X-Scheme) eq 0
        reqadd X-Scheme:\ https if needs_scheme { ssl_fc }
        reqadd X-Scheme:\ http if needs_scheme !{ ssl_fc }
####

userlist L1
        group G1
        user USERNAME insecure-password PASSWORD groups G1
Source: Printoid
Pi Camera

If you also want webcam and timelapse support, you'll need to download and compile MJPG-Streamer:
cd ~
sudo apt install subversion libjpeg62-turbo-dev imagemagick ffmpeg libv4l-dev cmake
git clone https://github.com/jacksonliam/mjpg-streamer.git
cd mjpg-streamer/mjpg-streamer-experimental
export LD_LIBRARY_PATH=.
make
This should hopefully run through without any compilation errors. You should then be able to start the webcam server using:
./mjpg_streamer -i "./input_raspicam.so -fps 5" -o "./output_http.so"This should give something like:
MJPG Streamer Version: git rev: f387bb44e6c087271b763b27da998bf2e06c4f5d
 i: fps.............: 5
 i: resolution........: 640 x 480
 i: camera parameters..............:

Sharpness 0, Contrast 0, Brightness 50
Saturation 0, ISO 0, Video Stabilisation No, Exposure compensation 0
Exposure Mode 'auto', AWB Mode 'auto', Image Effect 'none'
Metering Mode 'average', Colour Effect Enabled No with U = 128, V = 128
Rotation 0, hflip No, vflip No
ROI x 0.000000, y 0.000000, w 1.000000 h 1.000000
 o: www-folder-path......: disabled
 o: HTTP TCP port........: 8080
 o: HTTP Listen Address..: (null)
 o: username:password....: disabled
 o: commands.............: enabled
If you now point your browser to http://<your Raspi's IP>:8080/?action=stream, you should see a moving picture at 5fps.
Open OctoPrint's settings dialog and under Webcam & Timelapse configured the following:
- Stream URL:
/webcam/?action=stream - Snapshot URL:
http://127.0.0.1:8080/?action=snapshot - Path to FFMPEG:
/usr/bin/ffmpeg
Restart the OctoPrint server, clear the cache on your browser and reload the OctoPrint page. You should now see the stream from the webcam in the Control tab, and a Timelapse tab with options.
If you want to be able to start and stop mjpeg-streamer from within OctoPrint create a folder and script called webcam:
mkdir /home/pi/scripts/
sudo nano /home/pi/scripts/webcam
Put the following in /home/pi/scripts/webcam:
#!/bin/bash
# Start / stop streamer daemon

case "$1" in
    start)
        /home/pi/scripts/webcamDaemon >/dev/null 2>&1 &
        echo "$0: started"
        ;;
    stop)
        pkill -x webcamDaemon
        pkill -x mjpg_streamer
        echo "$0: stopped"
        ;;
    *)
        echo "Usage: $0 {start|stop}" >&2
        ;;
esac
Create other script called webcamDaemon
sudo nano /home/pi/scripts/webcamDaemonPut the following in /home/pi/scripts/webcamDaemon:
#!/bin/bash

MJPGSTREAMER_HOME=/home/pi/mjpg-streamer/mjpg-streamer-experimental
MJPGSTREAMER_INPUT_USB="input_uvc.so"
MJPGSTREAMER_INPUT_RASPICAM="input_raspicam.so"

# init configuration
camera="auto"
camera_usb_options="-r 640x480 -f 10"
camera_raspi_options="-fps 10"

if [ -e "/boot/octopi.txt" ]; then
    source "/boot/octopi.txt"
fi

# runs MJPG Streamer, using the provided input plugin + configuration
function runMjpgStreamer {
    input=$1
    pushd $MJPGSTREAMER_HOME
    echo Running ./mjpg_streamer -o "output_http.so -w ./www" -i "$input"
    LD_LIBRARY_PATH=. ./mjpg_streamer -o "output_http.so -w ./www" -i "$input"
    popd
}

# starts up the RasPiCam
function startRaspi {
    logger "Starting Raspberry Pi camera"
    runMjpgStreamer "$MJPGSTREAMER_INPUT_RASPICAM $camera_raspi_options"
}

# starts up the USB webcam
function startUsb {
    logger "Starting USB webcam"
    runMjpgStreamer "$MJPGSTREAMER_INPUT_USB $camera_usb_options"
}

# we need this to prevent the later calls to vcgencmd from blocking
# I have no idea why, but that's how it is...
vcgencmd version

# echo configuration
echo camera: $camera
echo usb options: $camera_usb_options
echo raspi options: $camera_raspi_options

# keep mjpg streamer running if some camera is attached
while true; do
    if [ -e "/dev/video0" ] && { [ "$camera" = "auto" ] || [ "$camera" = "usb" ] ; }; then
        startUsb
    elif [ "`vcgencmd get_camera`" = "supported=1 detected=1" ] && { [ "$camera" = "auto" ] || [ "$camera" = "raspi" ] ; }; then
        startRaspi
    fi

    sleep 120
done
Make sure both files are executable:
sudo chmod +x /home/pi/scripts/webcam
sudo chmod +x /home/pi/scripts/webcamDaemon
If you want autostart of the webcam you need to add the following line to /etc/rc.local
Just make sure to put it above the line that reads exit 0.
sh /home/pi/scripts/webcam start
If you want to be able to start and stop the webcam server through OctoPrint's system menu do:
sudo nano ~/.octoprint/config.yamlAdd the following to config.yaml:
system:
  actions:
    - action: streamon
      command: /home/pi/scripts/webcam start
      confirm: false
      name: Start video stream
    - action: streamoff
      command: /home/pi/scripts/webcam stop
      confirm: false
      name: Stop video stream
Source: Discourse
How to fix Raspberry Pi 3, B, B+ or Pi Zero W disconnects from Wi-Fi
Check status of Power Management:
sudo iwconfig wlan0if Power Management: on and you want to disable in every boot go to:
sudo nano /etc/rc.localJust make sure to put it above the line that reads exit 0.
Add this line:
iwconfig wlan0 power offAfter reboot test if Power Management: off
sudo iwconfig wlan0And should be Power Management: off
Source: Thelowercasew
Best Octoprint Plugins (Working)
We are working on this post, sorry for the inconvenience.
PSU Control
Sources:
Navbar Temp
Telegram Bot
Bed Level Visualizer
Detailed Progress
Best Octoprint Apps
Printoid

If you are using Android I recommend you to use Printoid, you could get more info here
OctoClient

If you are using iOS I recommend you to use OctoClient, you could get more info here
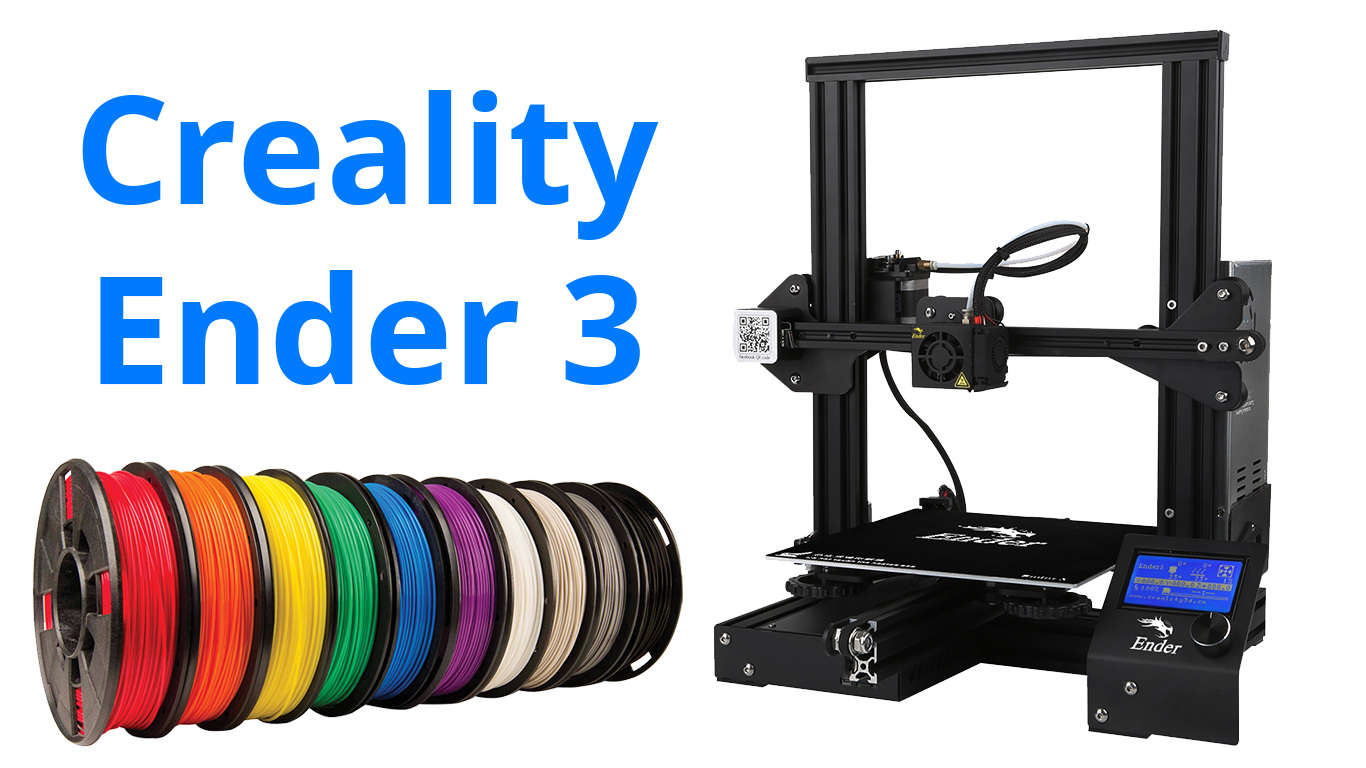
Ender 3 Mods (Working)
We are working on this post, sorry for the inconvenience.
Typical errors (Working)
EEPROM CRC mismatch - (stored) X != X (calculated)!
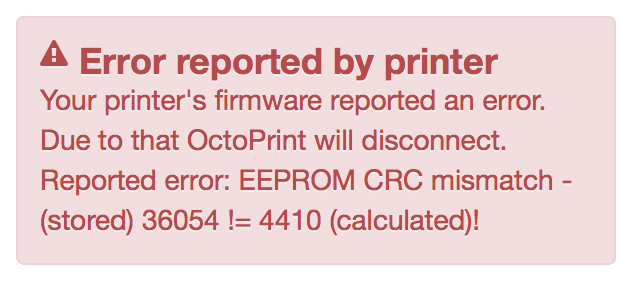
Your printer's firmware reported an error. Due to that OctoPrint will disconnect. Reported error: EEPROM CRC mismatch - (stored) 36054 != 4410 (calculated)!
If you get that error when try to connect to your printer via Octoprint and it disconnects from the printer:
- Go to
Settings>Serial connection>Behaviour. - On
Error Handingclick onIgnore Warning. - Now you can connect to your printer.
- Go to
Terminalan write M502 and send it. - Write it to the EEPROM whit M500 and send it.
- Set
Error Handingto back state, in my caseDisconnect from the printer.
Source: Robo3d
Calibrate eSteps (Steps per millimeter)
If your first layer do not have enough flow, you need to calibrate your eSteps
Source: Youtube
Where to buy ?
Ender 3 (USA Links)
Banggood
Ender 3 Pro (USA Links)
Banggood